Oxygen Tubing Help & Customer Support
Need More Help With Your Oxygen Tubing Setup?
If there is still an issue after reviewing the troubleshooting guides and watching the videos, feel free to reach out for help.
Contact us at service@reelfree.co if you still need help.
Quick Recommendations
- Out-of-the-Box Ready: Your device comes ready to go out of the box — no need to re-run tubing before use. Just connect 7ft clear tubing to the concentrator.
- Brake Setting: For best results, turn the brake knob to about 1/10th. This prevents the wheel from continuing to spin and unspool tubing when pulled too fast.
- Pulling Technique: Pull the tubing slowly or allow it to unreel naturally as you walk. This prevents overspinning.
- Low Resistance Tip: Use lower brake resistance when tubing is routed around several corners in the home.
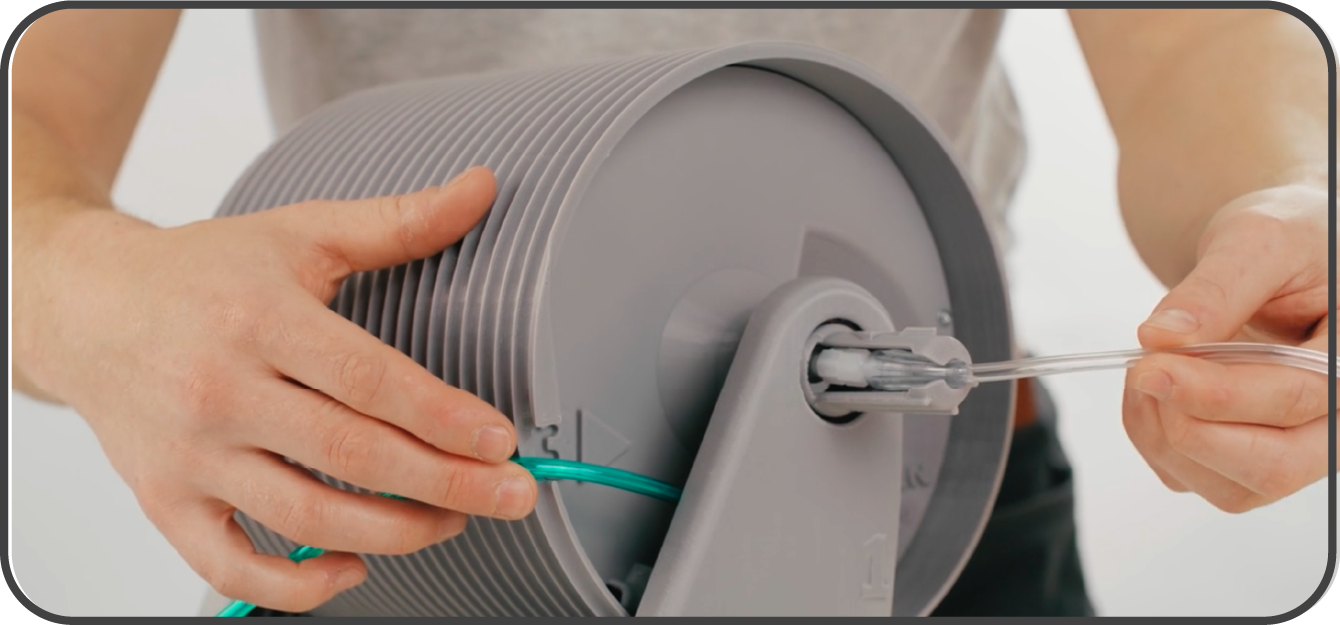
- Swivel Check: If tubing twists or will not lay correctly, make sure the clear tubing is pulled out from inlet 4 so the swivel adapter can rotate freely.
- Loose Green Tubing: If green tubing comes off the reel or wraps loosely, slightly increase the brake/tension knob and avoid pulling the tubing out quickly.
- Remote Battery: The remote uses a CR2032 coin cell battery. If the red light turns on when you press the button, the remote has power.
- Important: If your device is not working correctly, stop using it and contact customer support at service@reelfree.co.
- Before Fixing: Watch the troubleshooting videos before attempting to adjust or repair the device yourself.
Tubing Installation Guide
Compatible Oxygen Tubing Specifications
- External Diameter: 6-8mm
- Flow Rate: 1–10L/min
- Pressure: Do not exceed 10 PSI
- Type: 3-channel or crush-resistant tubing
- Maximum Length: 50 feet
- Warning: Do not service or maintain the device while in use.
Installation Steps
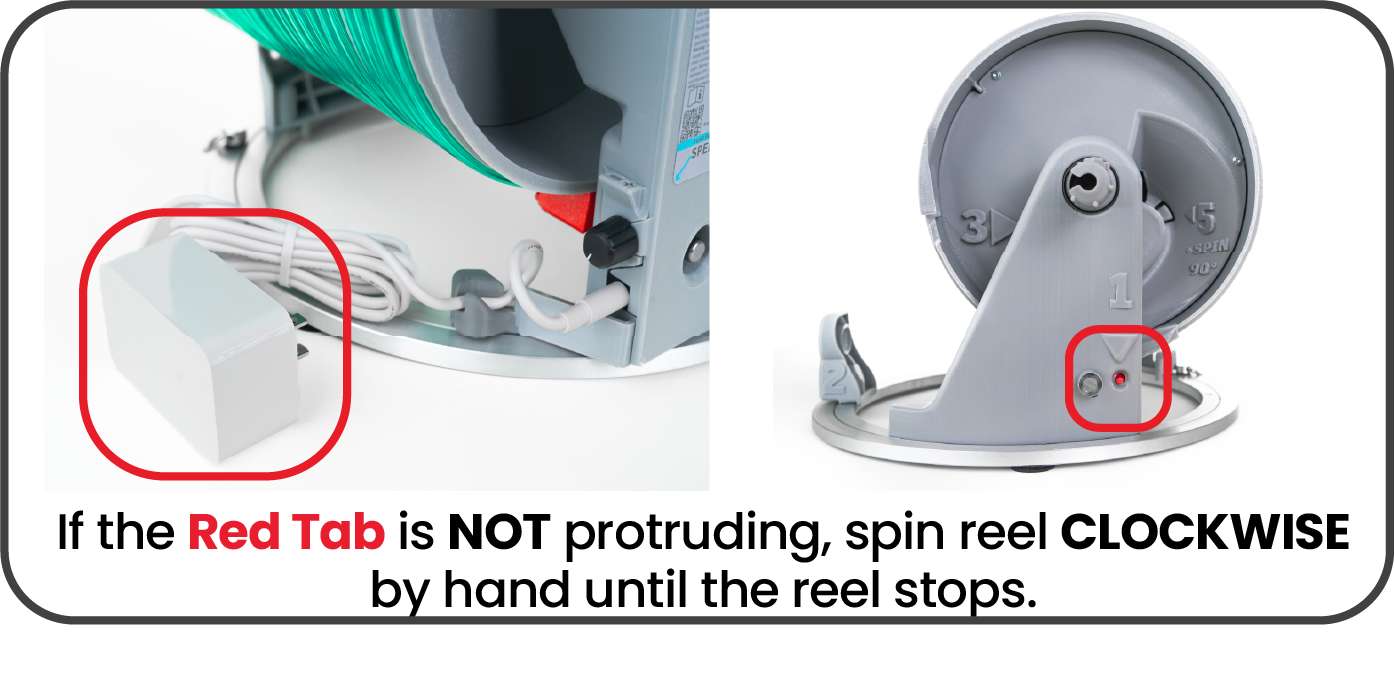
Step 1
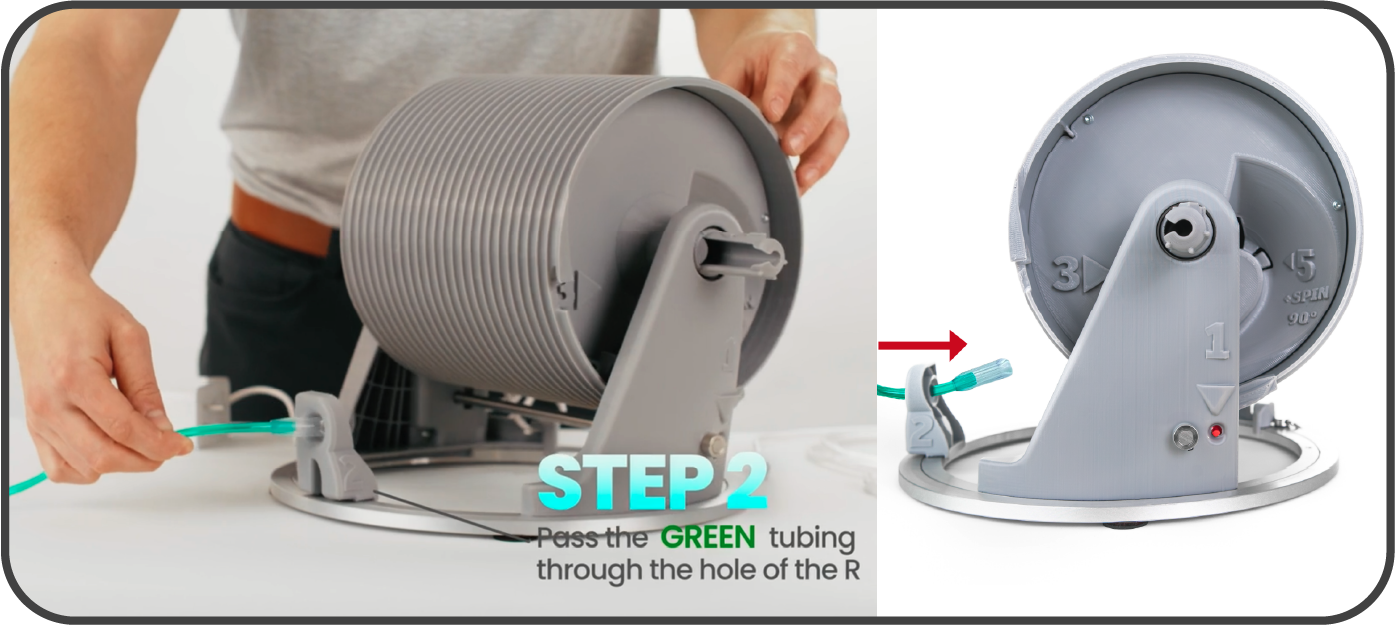
Step 2
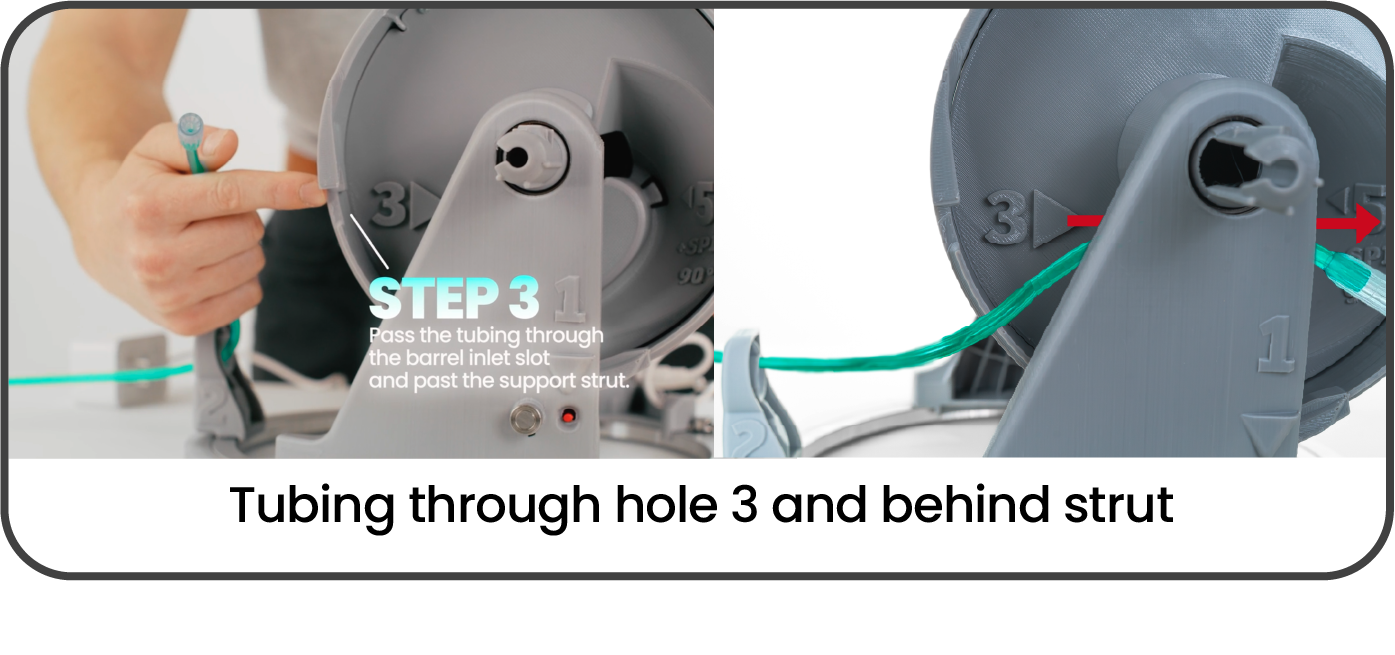
Step 3
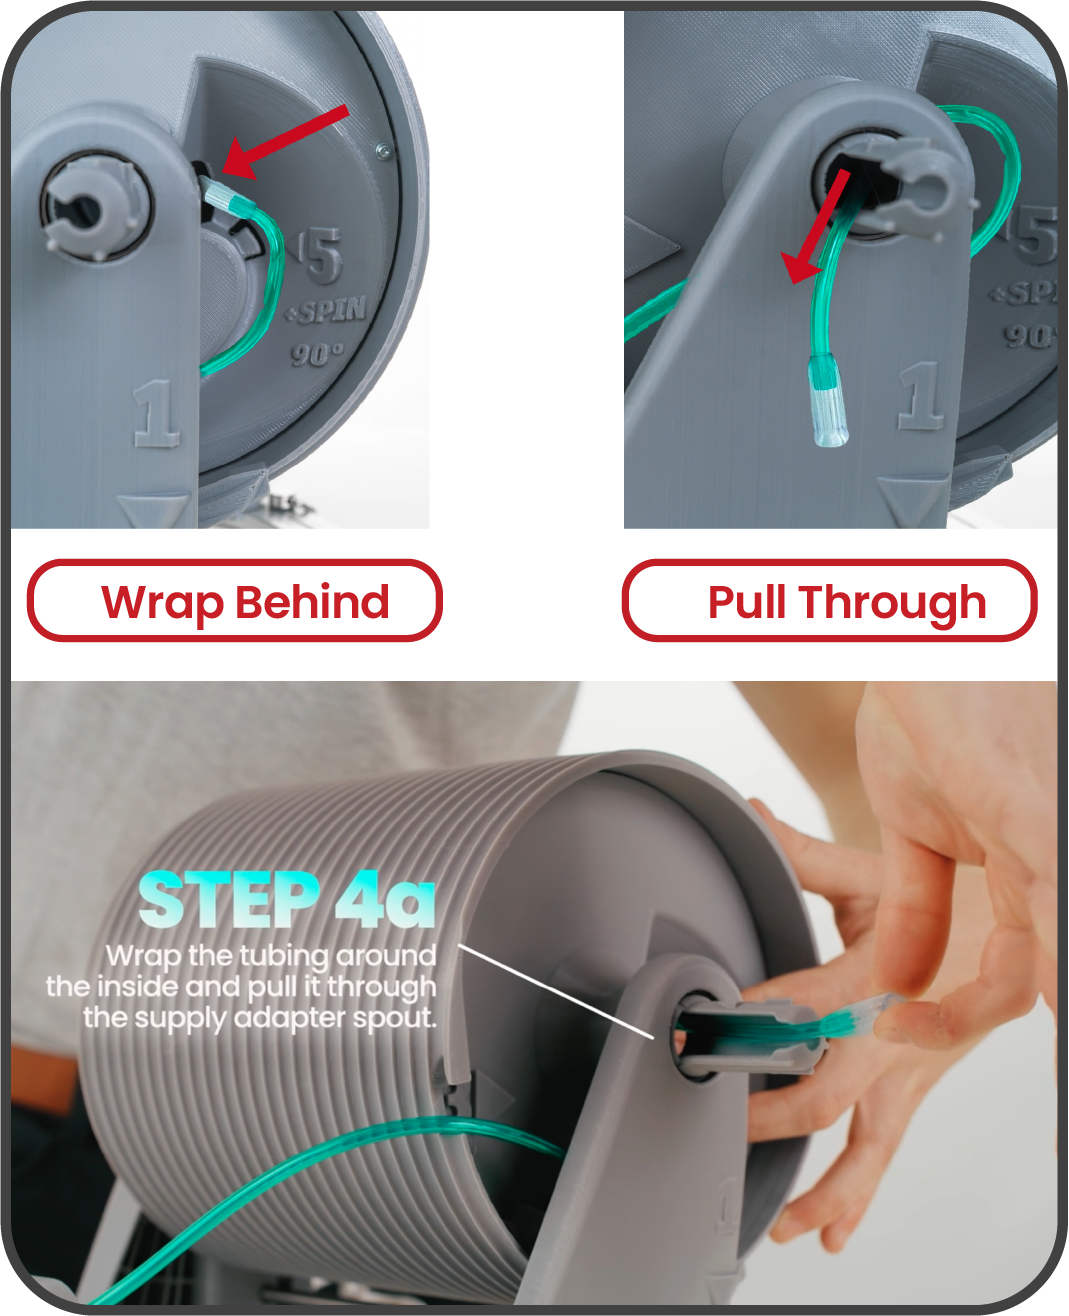
Step 4a
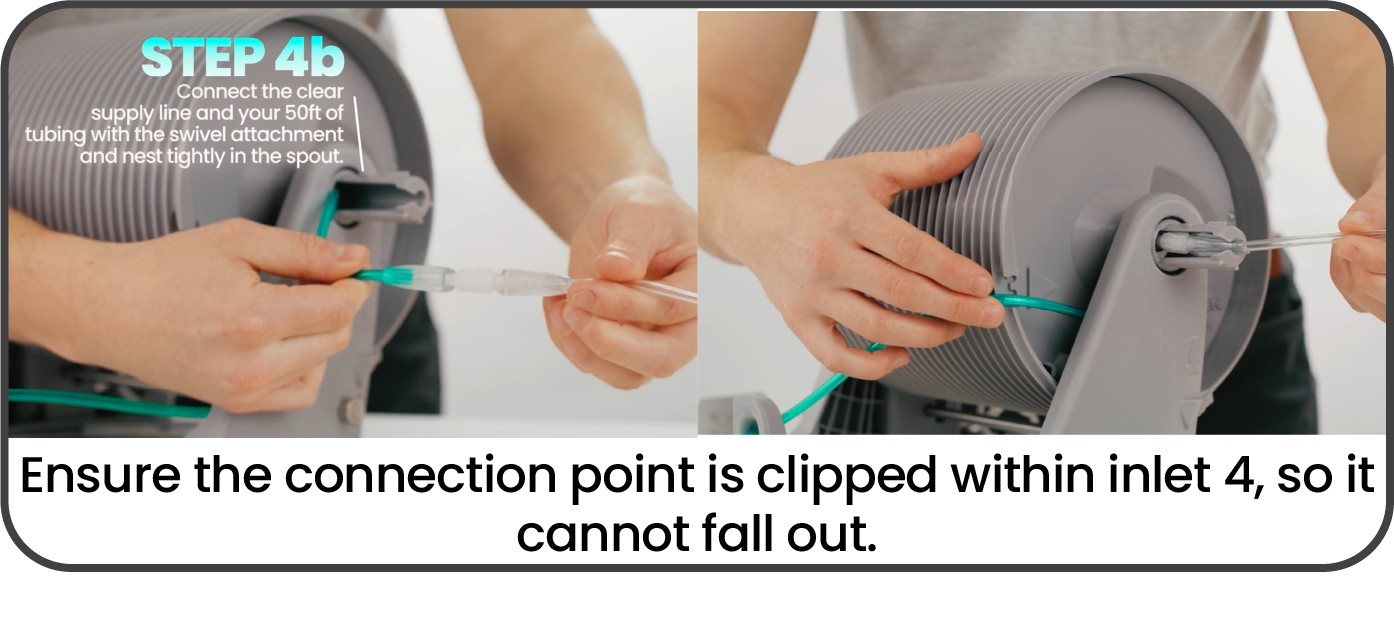
Step 4b
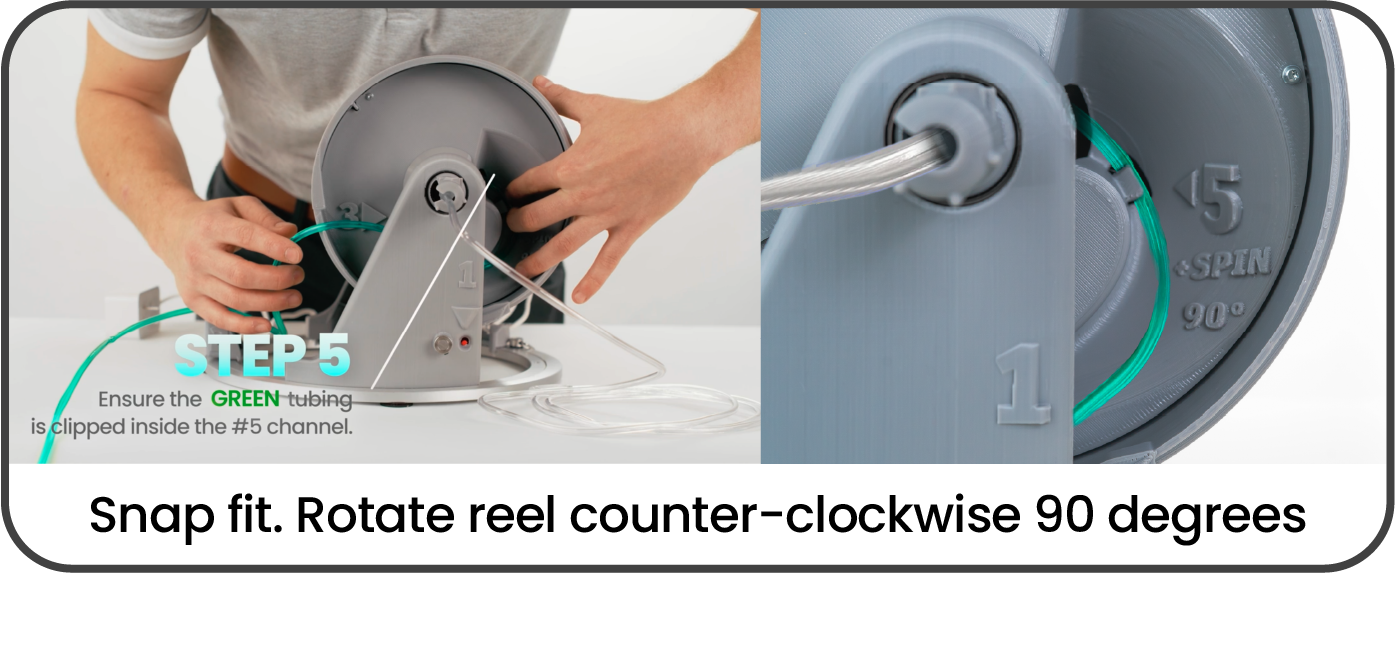
Step 5
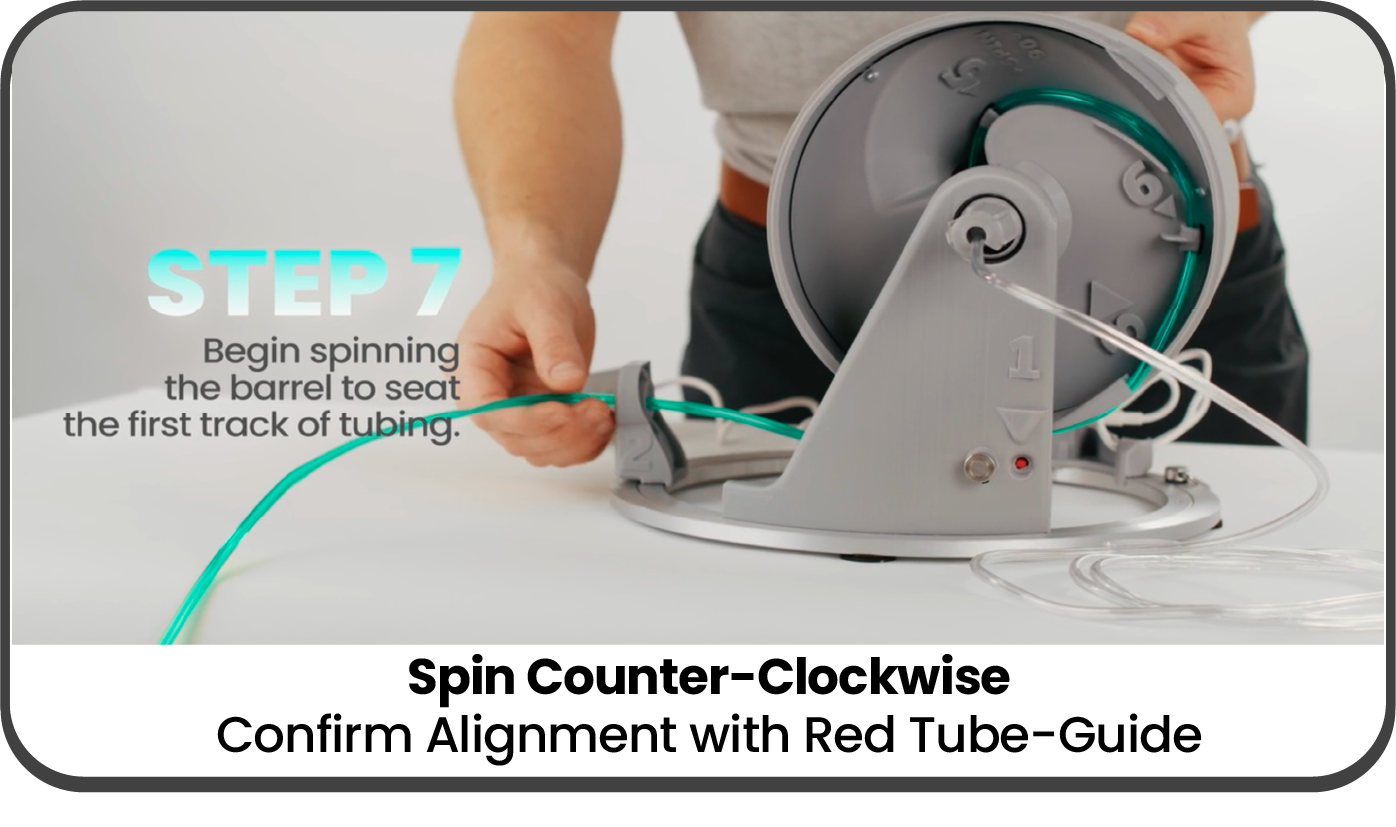
Step 7
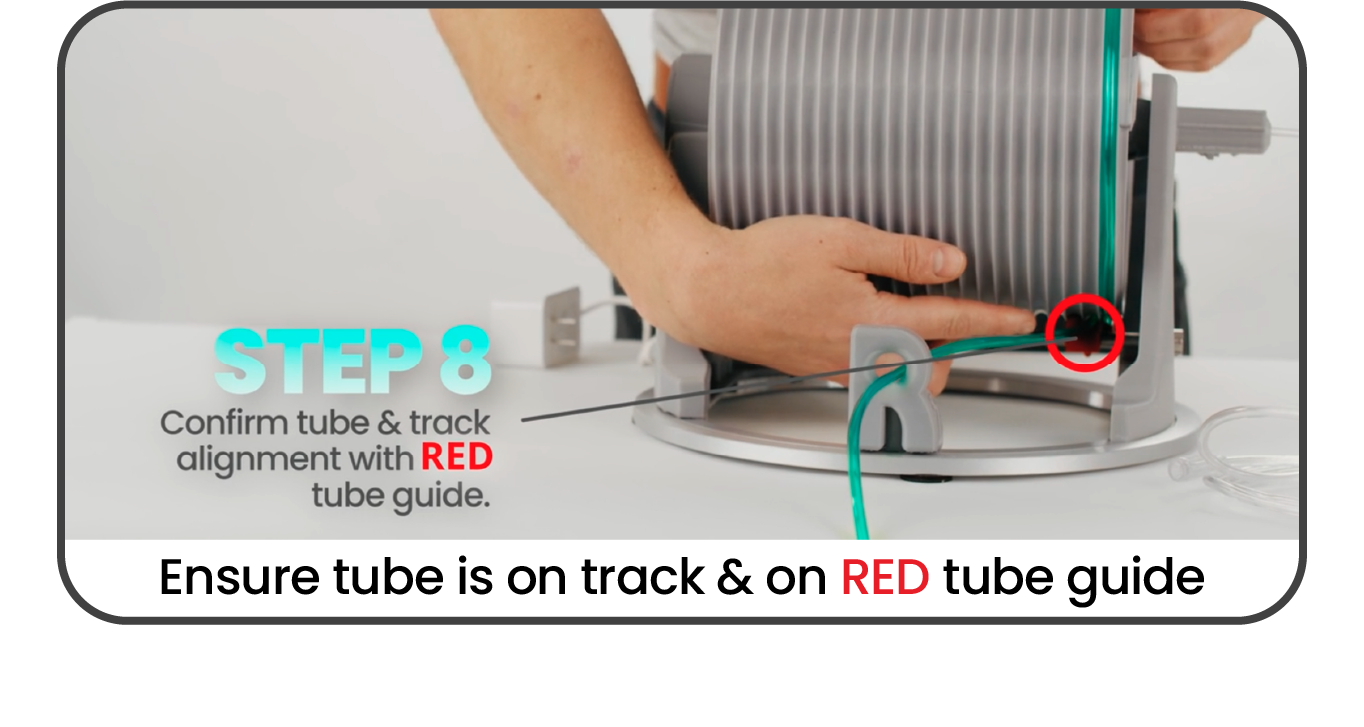
Step 8
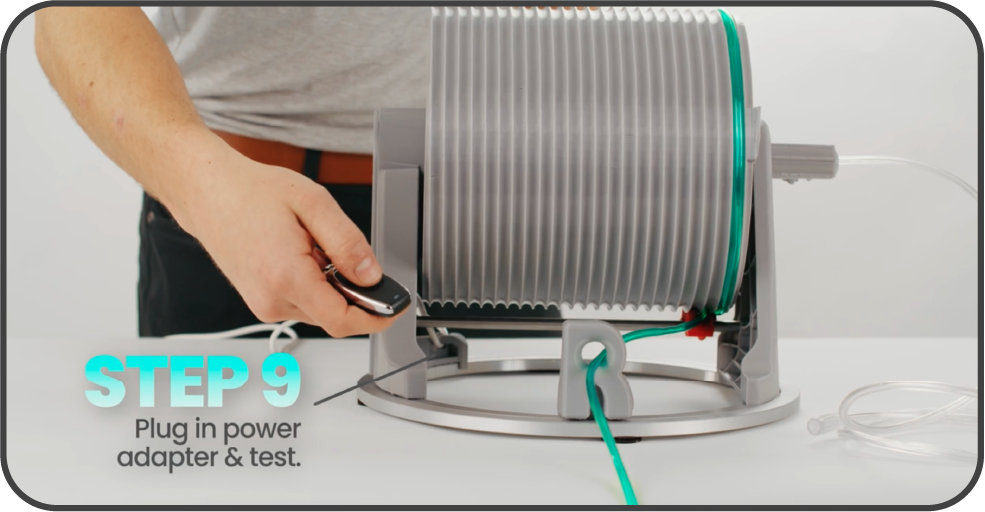
Step 9
Pairing Additional Remotes (Shipped Paired)
Pairing Instructions
- Do not pair remotes while device is in use.
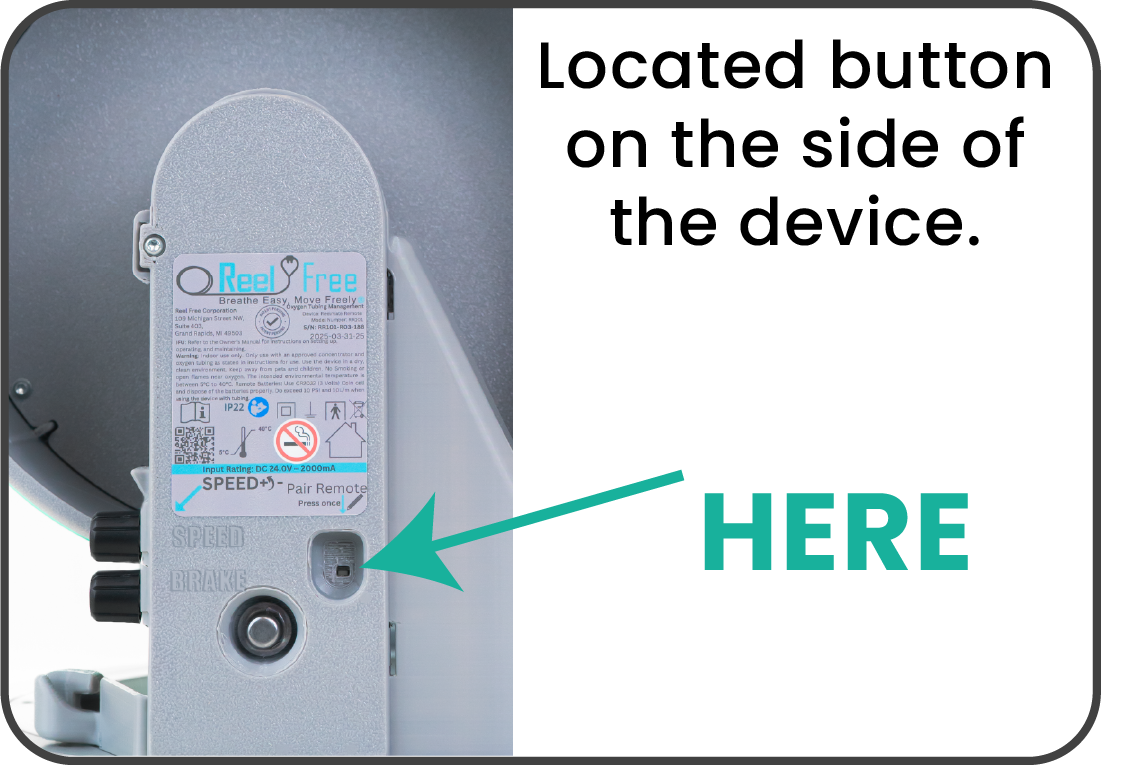
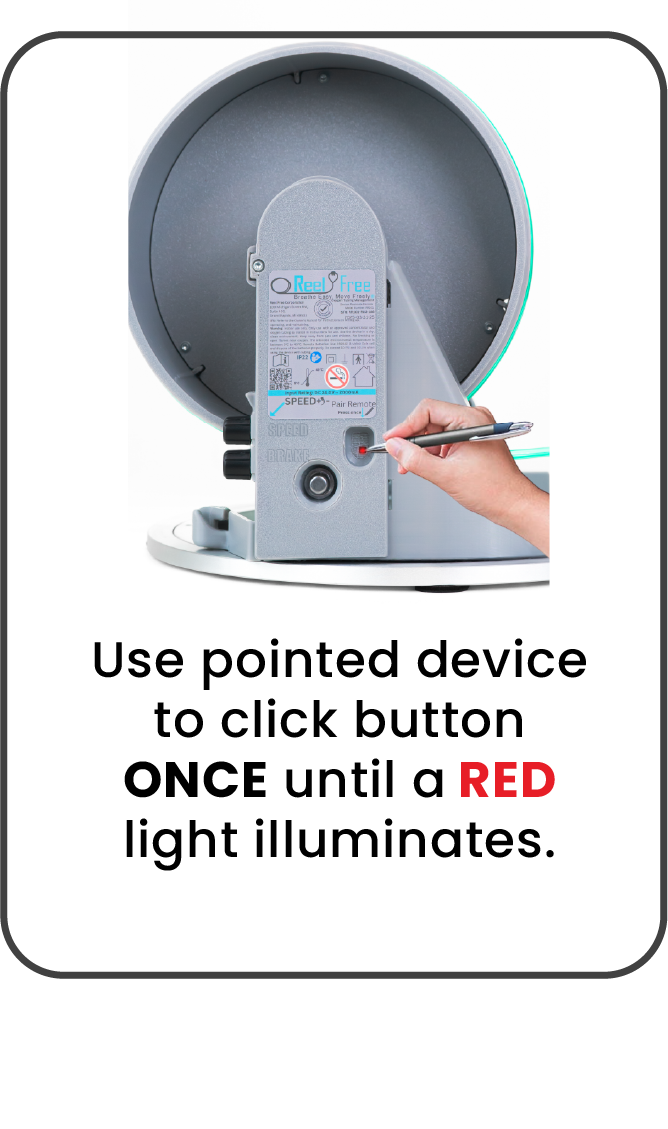
- Use a pen or similar pointed object to gently press the recessed "Pair" button ONCE.
- Note: Pressing the button multiple times may trigger constant reeling mode.
- If constant reeling occurs, unplug the device and plug it back in before restarting pairing steps.
- Red light will illuminate on the reel.
- Press the remote button. The red light will blink and then turn off—this confirms pairing.
- To reset the device, press the pair button 8 times. The LED will flash 7 times to confirm.
Pairing Steps
Step 1
Step 2
Step 3

How to Use the Device
Device Usage Steps
Step 1
Confirm tubing is installed.
Step 2
Confirm the 50 feet tubing is on the reel and connected to the male-to-male swivel adapter and attached to the oxygen supply with 7-foot clear tubing. Ensure the connection point between the male-to-male adapter and both tubings is recessed within inlet 4.
Step 3
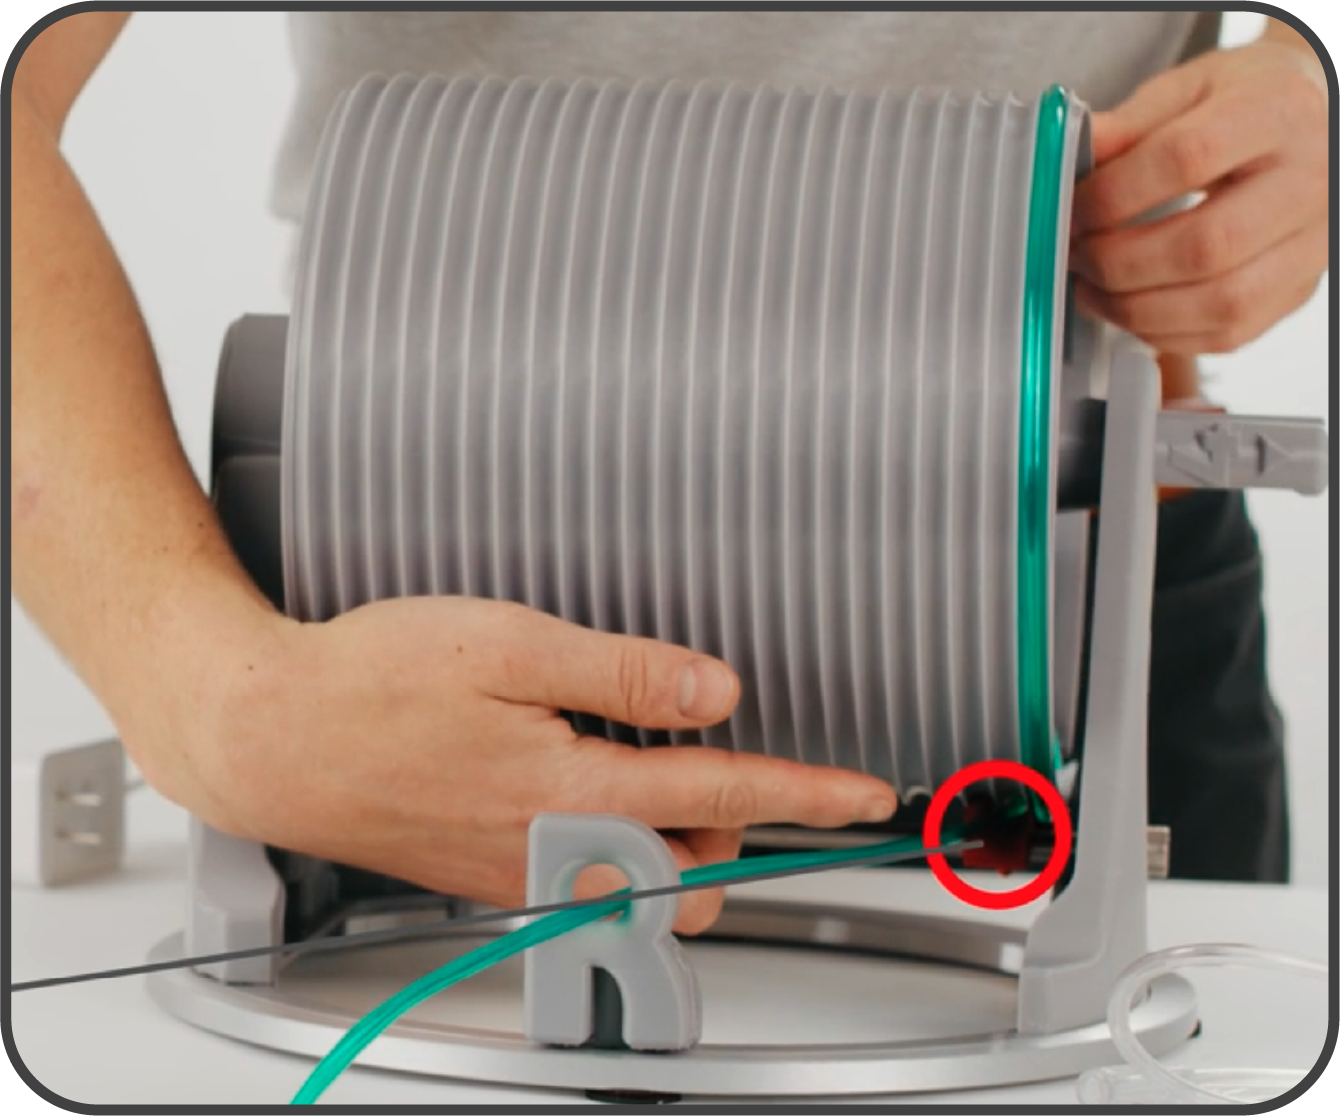
Confirm red tube guide aligns tubing properly on the helical channel of the drum.
Step 4
Plug the Reelmate Buddy into a wall outlet.
Step 5
Press the remote to retract up to 50 feet of tubing. (If the remote isn't paired, refer to Remote Pairing Troubleshooting.)
Step 6
Before connecting the nasal cannula, adjust speed as needed.
Step 7
Unreel tubing by pulling on the user's end of the tubing.
Step 8
Loop the provided tether underneath the wheel or foot of the oxygen concentrator or furniture. Clip the tether to the Reelmate Buddy and tighten it so there is approximately 24 inches of space between the Reelmate Buddy and the oxygen concentrator.
The silver eye is for the optional tether. In most cases, the rubber grips on the bottom keep the reel in place, but slick surfaces may need the tether to help keep the unit stable.
Step 9

Locate the speed control knob. This is the top knob labeled "Speed." Turn clockwise to increase speed and counterclockwise to decrease to your desired speed.
Step 10
Locate the brake control knob. This is the bottom knob labeled "Brake." Turn clockwise to increase resistance and counterclockwise to decrease. For larger homes, lower resistance is ideal; for smaller homes, higher resistance works best. Avoid pulling tubing too quickly at minimal resistance to prevent spinning too fast and tubing slippage.
If the green tubing is loose, shifting, or coming off the reel, slightly increase the brake/tension knob so the reel does not free-spin. Let the tubing unreel slowly and naturally as you move rather than yanking it out quickly.